In this comprehensive guide, discover step-by-step instructions on “how to DIY rain poncho.”
Rainy days might hinder outdoor activities. Plans, but with a little creativity and some basic materials, you can turn a gloomy day into an opportunity to showcase your crafting skills.
One of the essential items to have during a downpour is a reliable rain poncho. Why not make your own instead of settling for a generic store-bought option?
This thorough manual will lead you through the step-by-step process of creating a personalised and stylish DIY rain poncho that keeps you dry and reflects your unique taste.
Jump to a Specific Section
- Materials Needed
- Try It On
- FAQ’s
- Conclusion
Materials Needed
Before diving into the crafting process, gather the necessary materials. Most of these items can be found at your local craft store or even repurposed from things you have lying around at home. Here’s what you’ll need:
Waterproof Material:
Choose a waterproof fabric, like nylon or polyester. You can repurpose an old raincoat or purchase material from a craft store.
Measuring Tape:
Accurate measurements ensure your poncho fits well and provides adequate coverage.

Scissors:
A sturdy set of shears is necessary for cleanly cutting through the waterproof material.
Fabric Marker:
A fabric marker helps you outline the shape and cut lines on the material.
Sewing Machine or Needle and Thread:
You can use a sewing machine or hand-sew your poncho depending on your preference and skill level.
Velcro or Snaps:
These will create closures for your poncho.
Grommets and Cord:
Optional but can be added for a decorative touch and to create a more fitted look.
Now that your materials are ready let’s create your DIY rain poncho.
Take Measurements
The first step in creating a custom-fit poncho is to take accurate measurements. Measure from the base of your neck to your desired poncho length.
Additionally, measure from one wrist across your back to the other wrist to determine the width of the poncho. Add a few inches to these measurements to ensure the poncho provides sufficient coverage.
Create a Pattern
Using your measurements, create a pattern on a large piece of paper or cardboard. The shape should resemble a wide rectangle with a semi-circle cut out for the neck hole. This pattern will serve as your guide when cutting the waterproof material.
Cut the Waterproof Material
Place the pattern on the waterproof material and trace around it using a fabric marker. Carefully cut along the traced lines to create the main body of your poncho. Be mindful of the neck hole, ensuring it is large enough for comfortable wear.
how to diy rain poncho
Add Closures
Decide how you want to fasten your poncho. You can use Velcro strips or snaps along the sides to create closures.
Sew these closures securely, ensuring they provide a snug fit when the poncho is worn.
Customize with Grommets and Cord (Optional)
To add even more flair and practicality, consider adding grommets along the bottom edge of the poncho.
Thread a cord through the grommets, allowing you to cinch the poncho at the waist if desired. This adds a decorative element and helps create a more fitted look.
Test for Waterproofing
Perform a waterproofing test before taking your DIY poncho out into the rain. Sprinkle some water on the fabric to see if it beads up and rolls off. If needed, apply a waterproofing spray to enhance the material’s water-resistant properties.
Personalize Your Poncho
Now that the basic structure of your poncho is complete, it’s time to add personal touches. Consider decorating your poncho with fabric paint, patches, or even reflective tape for increased visibility in low-light conditions. Let your creativity shine!
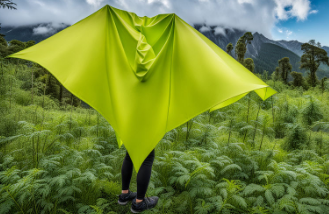
Try It On
Put on your newly crafted rain poncho to ensure it fits comfortably and provides adequate coverage. Make any necessary adjustments to the closures or length to ensure a perfect fit.

FAQ’s
How do you make a waterproof poncho?
Making a waterproof poncho involves a straightforward process that combines selecting the right materials and employing basic sewing techniques. Here’s a step-by-step guide:
Materials Needed:
Waterproof fabric (such as nylon or polyester)
Measuring tape
Scissors
Fabric marker
Sewing machine or needle and thread
Velcro or snaps for closures
Optional: Grommets and cord for added decoration and a more fitted look
Steps:
Take Measurements:
Measure from the base of your neck to your desired poncho length and from wrist to wrist across your back for width. Add extra inches for coverage.
Create a Pattern:
Draw a pattern on paper or cardboard using your measurements. Include a semi-circle for the neck hole.
Cut the Material:
Trace the pattern onto waterproof fabric, cut along the lines, and be mindful of the neck hole’s size.
Add Closures:
Decide on closures, such as Velcro or snaps, and sew them securely along the sides for easy wear and removal.
Optional Decorations:
Add grommets along the bottom edge for a decorative touch. Thread a cord through for a more fitted appearance.
Waterproofing Test:
Sprinkle water on the fabric to test its water-resistant properties. Apply a waterproofing spray if needed.
Personalise:
Decorate the poncho with fabric paint, patches, or reflective tape to suit your style.
Are ponchos easy to make?
Yes, ponchos are generally easy to make, especially if you choose a simple design. The basic structure involves creating a rectangular shape with a neck hole, adding closures for easy wear, and customising as desired.
The simplicity of the design makes it an ideal project for both beginners and experienced crafters.
With readily available materials and a few sewing skills, you can create a personalised and functional waterproof poncho in just a few steps. Personalising your poncho allows for creative expression, making crafting even more enjoyable.
Conclusion
Congratulations! You’ve successfully created your DIY rain poncho that keeps you dry and reflects your style.
Crafting your outdoor gear allows you to showcase your creativity while ensuring that your rain gear is as unique as you are.
So, the next time you find yourself caught in a sudden downpour, you’ll be well-prepared with a one-of-a-kind poncho you made with your two hands. Stay dry and stylish!