Discover the joy of crafting with our step-by-step guide on “How to Make a Circle Rain Poncho for a Doll.”
For those rainy days when your doll needs protection from the miniature storm, a circle rain poncho can be practical and adorable.
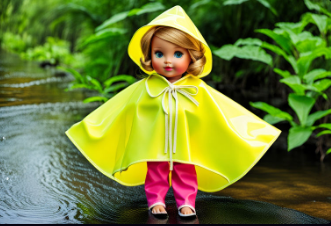
Creating a customized rain poncho for your doll is a delightful crafting project that allows you to showcase your creativity.
In this step-by-step guide, we’ll walk you through making a circle rain poncho for your doll, ensuring both style and functionality.
Jump to a Specific Section
Materials Needed:
Waterproof Fabric: Choose a lightweight and waterproof fabric for the rain poncho. Options like vinyl or oilcloth work well for this purpose.
Pattern Paper:
Use a pattern or any large piece of paper to draft the circle pattern.
Scissors:
Sharp scissors are essential for cutting the fabric accurately.
Pencil:
A pencil will be handy for marking and sketching on the pattern paper.

Compass:
A compass is a useful tool for drawing a perfect circle.
Velcro or Snaps:
You’ll need velcro strips or snaps to fasten the poncho around the doll’s neck.
Measure and Draft the Pattern
Measure the distance from your doll’s neck to the desired length of the poncho (usually around the knee area).
Using a compass, draw a circle on the pattern paper with a radius equal to the measured distance.
Cut the Fabric
Place the pattern on the waterproof fabric and cut around it. You’ll end up with a circular piece of fabric.
Cut an Opening
Find the center of the circle and cut a small semi-circle or slit to create an opening for the doll’s head.
Add Fasteners
Along the edge of the opening, attach velcro strips or sew-on snaps to fasten the poncho securely around the doll’s neck.
Embellish (Optional)
Add embellishments like decorative trim, patches, or even a small hood for extra flair.
Test and Adjust
Place the poncho on your doll to ensure a proper fit. Make any necessary adjustments to the size or fasteners.
Secure the Edges (Optional)
To prevent fraying, you can use fabric glue or sew along the edges of the poncho.
how to make a circle rain poncho for a doll
FAQ’s
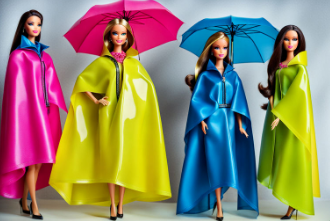
How do I make a Barbie poncho?
Creating a stylish and adorable poncho for your Barbie doll is a delightful DIY project that adds a touch of fashion to her wardrobe. Follow these simple steps to craft a miniature poncho:
Materials Needed:
Fabric:
Choose a lightweight, colorful fabric for the poncho.
Scissors:
Sharp scissors are essential for precise cutting.
Velcro or snaps:
To fasten the poncho.
Decorative Elements:
Optional embellishments like ribbons, buttons, or lace
Steps:
Measure and Cut:
Measure the distance from the doll’s neck to the desired length of the poncho.
Using the measurements, cut a rectangular or circular piece of fabric.
Create an Opening:
Find the center of the fabric and cut a small semi-circle or slit to create an opening for the doll’s head.
Add Fasteners:
Attach velcro strips or sew on snaps along the edges of the opening to secure the poncho around the doll’s neck.
Embellish (Optional):
Get creative by adding decorative elements like ribbons, buttons, or lace to enhance the poncho’s aesthetic appeal.
Test and Adjust:
Place the poncho on the Barbie doll to ensure a proper fit. Make any necessary adjustments to the size or fasteners.
Secure the Edges (Optional):
To prevent fraying, use fabric glue or sew along the edges of the poncho.
Enjoy dressing up your Barbie doll in her stylish, handmade poncho!
How to make a robe for a doll?
Crafting a cozy robe for your doll is a fun and rewarding project, adding a touch of comfort to her wardrobe. Here’s a simple guide to making a doll-sized robe:
Materials Needed:
Soft Fabric: Choose a comfortable and soft fabric for the robe.
Scissors: Sharp scissors for precise cutting.
Ribbon or Elastic: To create closures for the robe.
Sewing Machine or Needle and Thread.
Steps:
Measure and Cut:
Measure the doll from neck to ankle to determine the length of the robe.
Cut a rectangular fabric, ensuring it’s wide enough to wrap around the doll comfortably.
Create Sleeves:
Cut inward from each top corner of the rectangle to create armholes, leaving enough space for sleeves.
Sew Side Seams:
Sew the side seams of the robe, leaving openings for the arms.
Add Sleeves:
If you’ve left openings for sleeves, hem the edges to create finished sleeves.
Attach Closures:
Sew on a ribbon or add elastic around the waist to create closures for the robe.
Embellish (Optional):
Add decorative elements like lace or trim for an extra touch of flair.
Enjoy dressing your doll in her cozy and stylish handmade robe!
These simple DIY projects provide a wonderful opportunity to personalize your doll’s wardrobe while unleashing creativity.
Conclusion:
Creating a circle rain poncho for your doll is a delightful and rewarding crafting project. Not only does it serve a functional purpose, but it also allows you to express your creativity through fabric choices and embellishments.
This step-by-step guide ensures your doll is well-prepared for the next imaginary rain shower, showcasing your DIY skills and providing endless imaginative play.